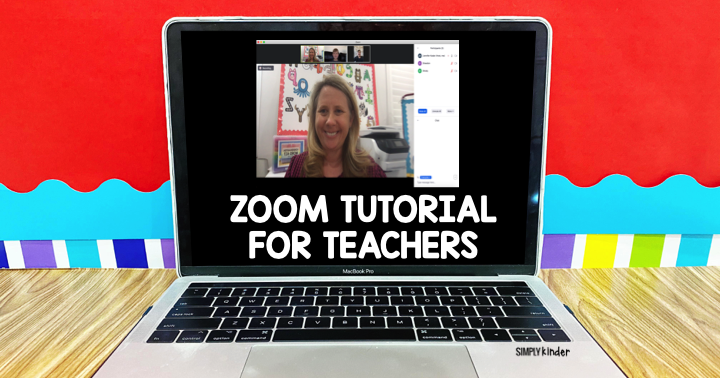

Check out this jam-packed informative video on how to use Zoom for teaching during distance learning. We will take you on a step-by-step video tutorial on how to use Zoom with students or teachers for instruction, class building, or group meetings. Learn all about Zoom with these directions, video, and FREE cheat sheet.
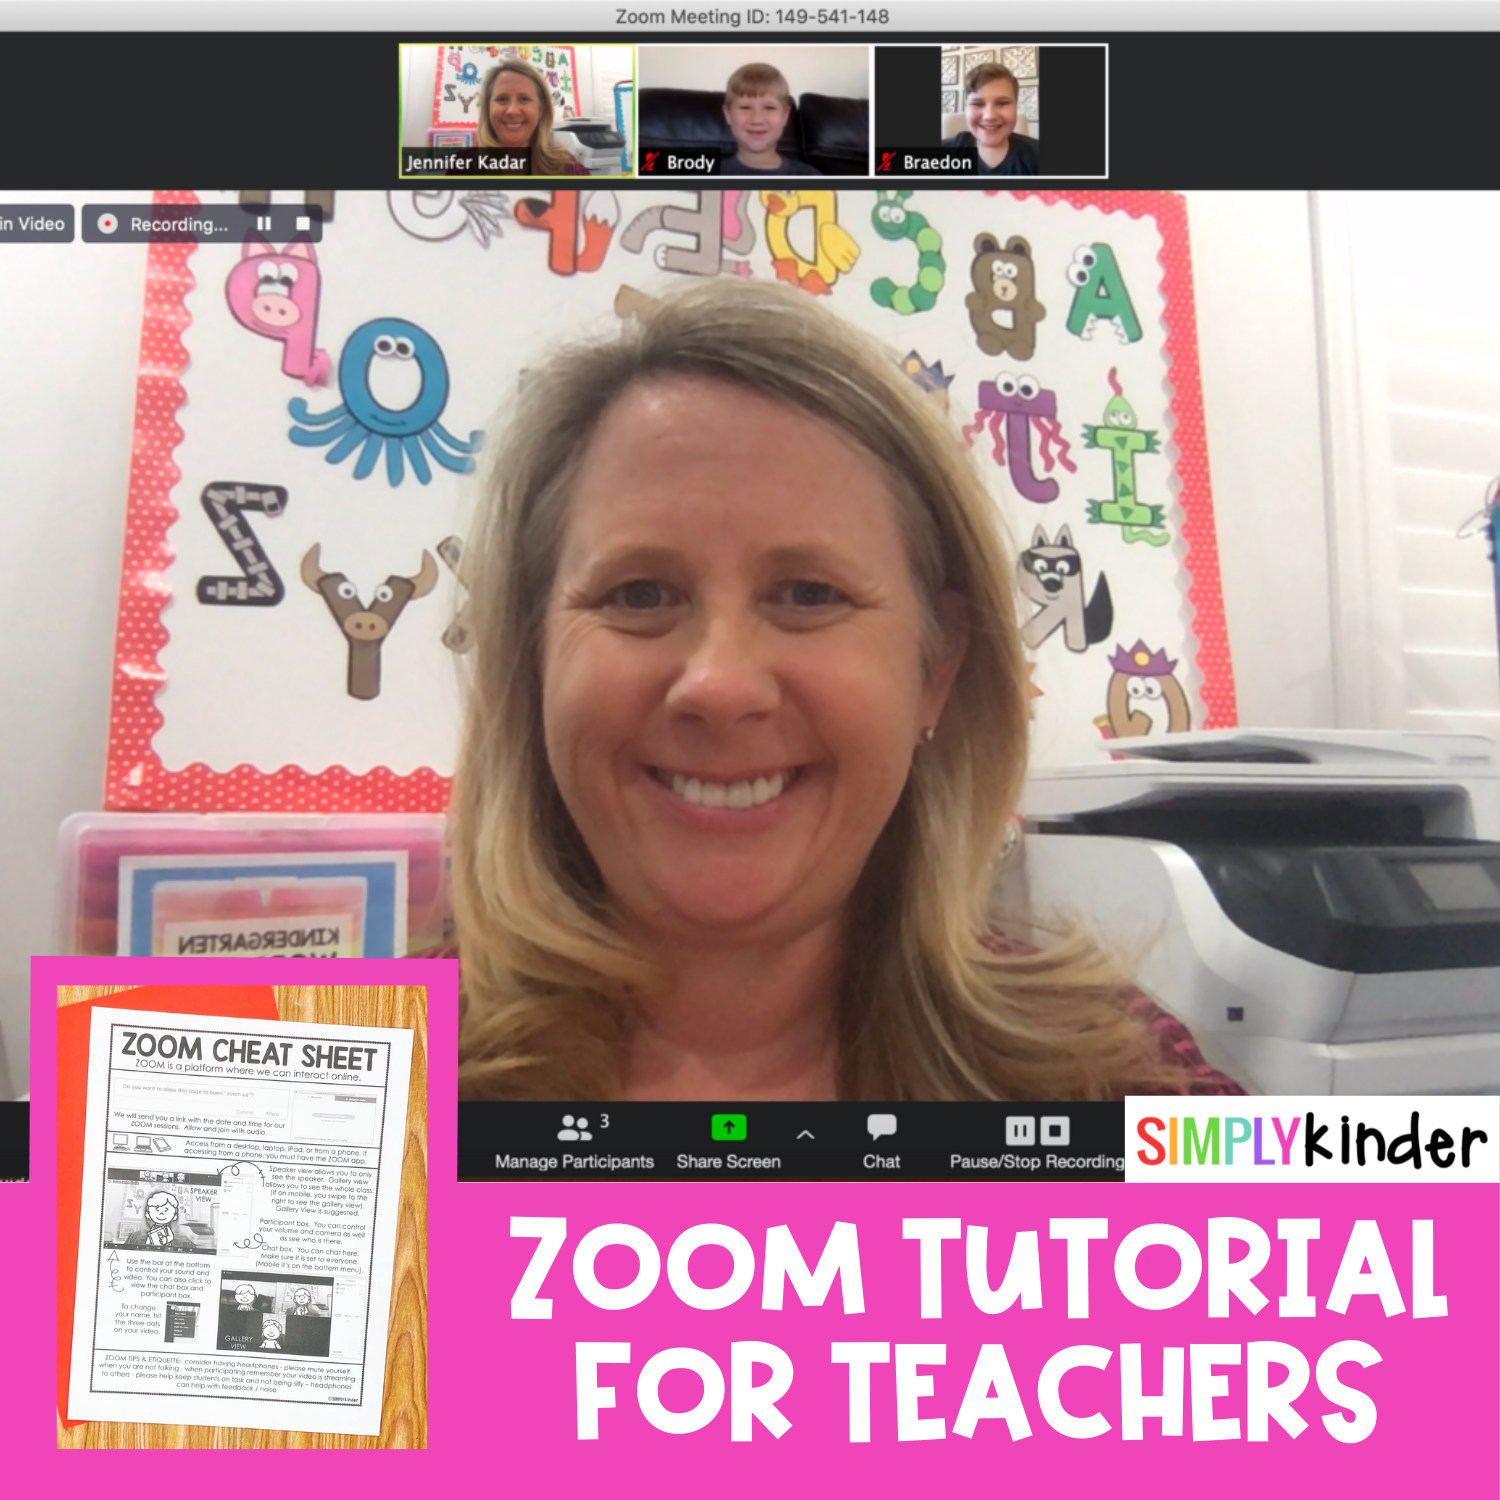
ZOOM is a great online platform that teachers can use for online teaching. But it can be a little intimidating and overwhelming. And so here is our ZOOM tutorial for teachers! (We have a FREE FAMILY CHEAT SHEET at the end too).
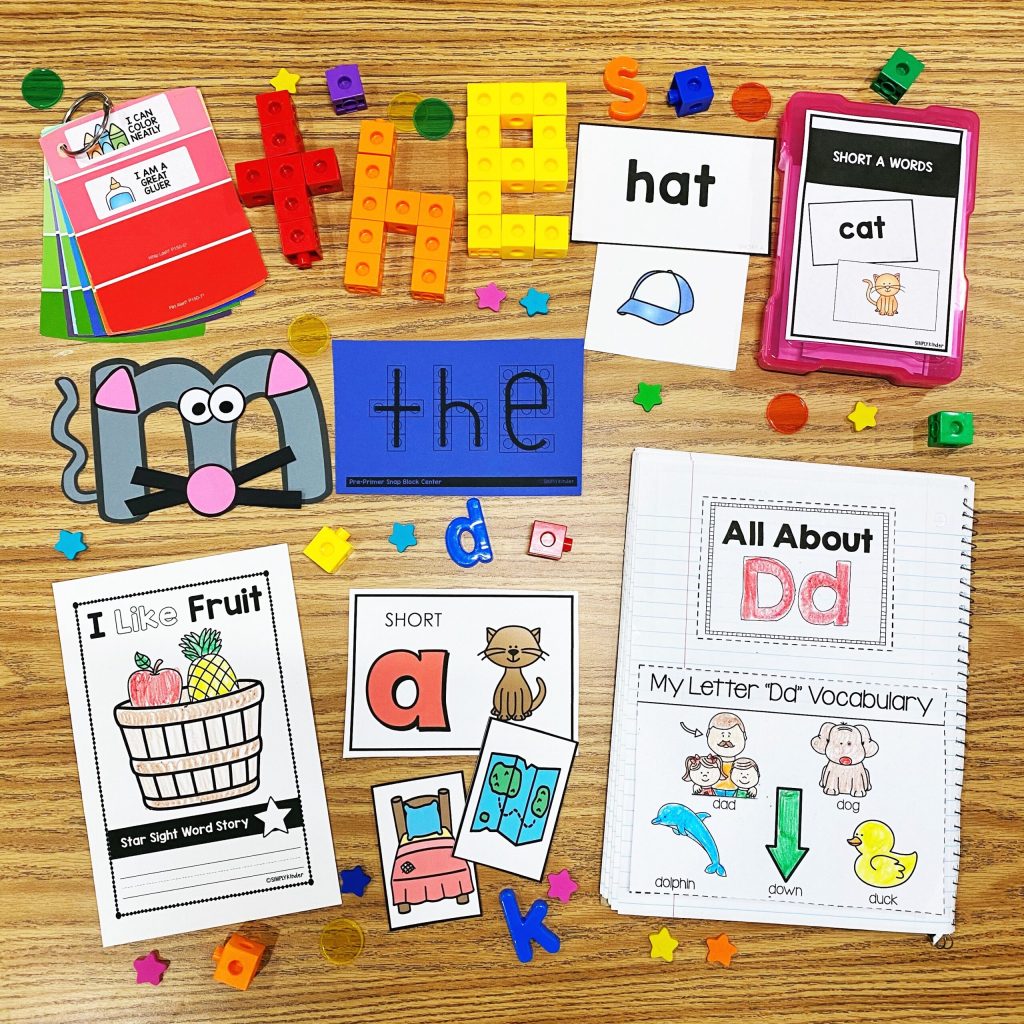
This article works well with these Simply Kinder resources:
I have been using ZOOM for about a year to conference with blogging colleagues and whatnot. And so when we saw teachers stressing over how it works, we knew we had to make a video.
Let’s start with a blurb about privacy and following district and state requirements. We are showing you how to do this per the request of teachers in our community but it is 100% up to you to make sure you are allowed to do it. I would double and triple check it is something you can do with your students.
Watch to see how to set up a ZOOM meeting, how to invite your families, how to manage students, how to stream it to Facebook, how to share your desktop, how to use the whiteboard, and how to end/save your videos. This video is JAM PACKED!
You can also watch the video on YouTube here.
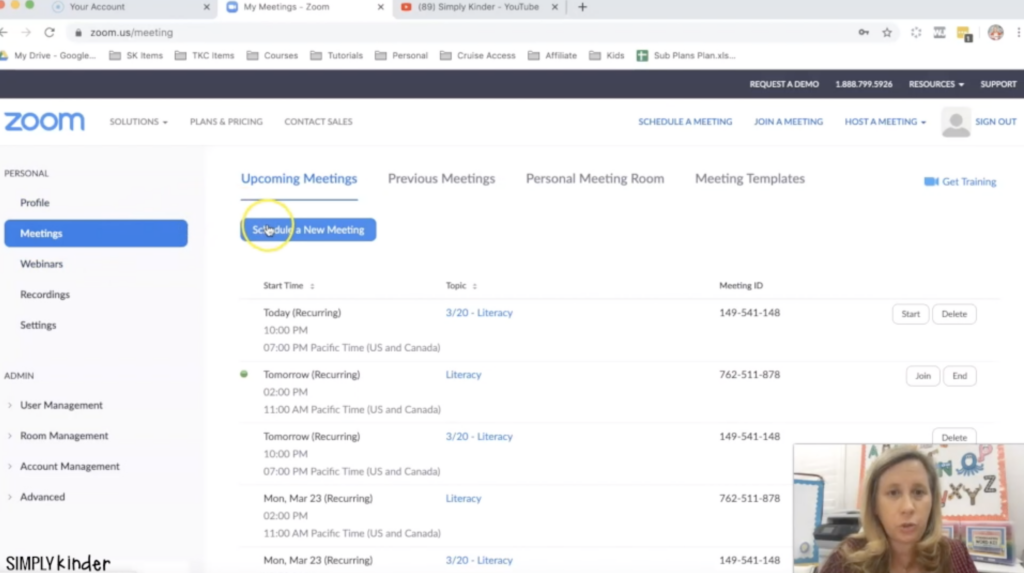
I always start by going to my profile after I log in. This is like the base camp for all things ZOOM. You can use those quick links but I prefer to go here.

It defaults to your profile. You will want to upload a profile image. This will be what shows if you turn off your camera in ZOOM.
You have two options on how to meet – a Meeting and a Webinar. They are basically the same except webinars allow you to stream to a Facebook group though so if you want to do that you will need to select webinar. (Click here for a tutorial on how to set up a private class Facebook group).
For basic ZOOM-ing with your class, a Meeting is exactly what you need.
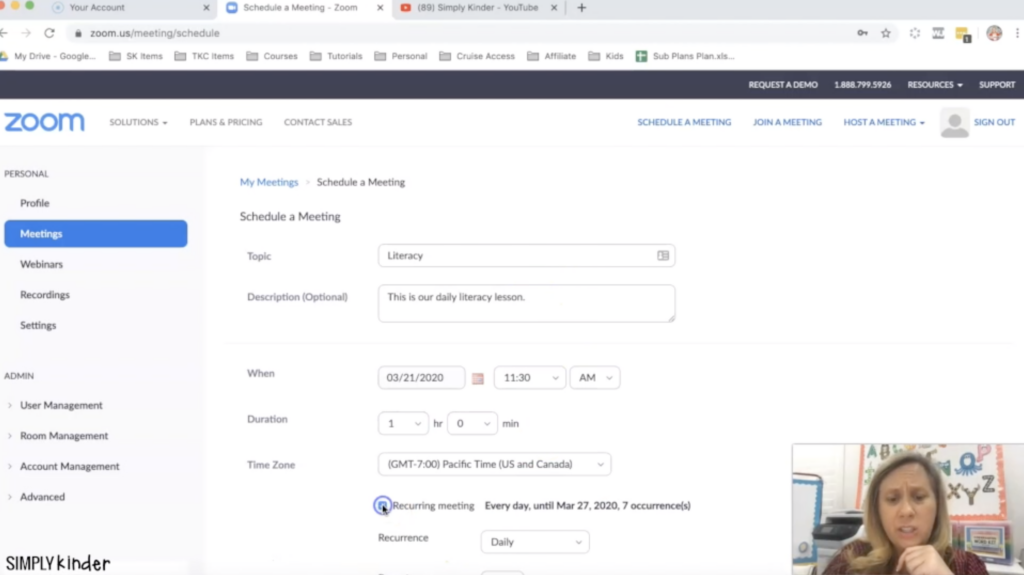
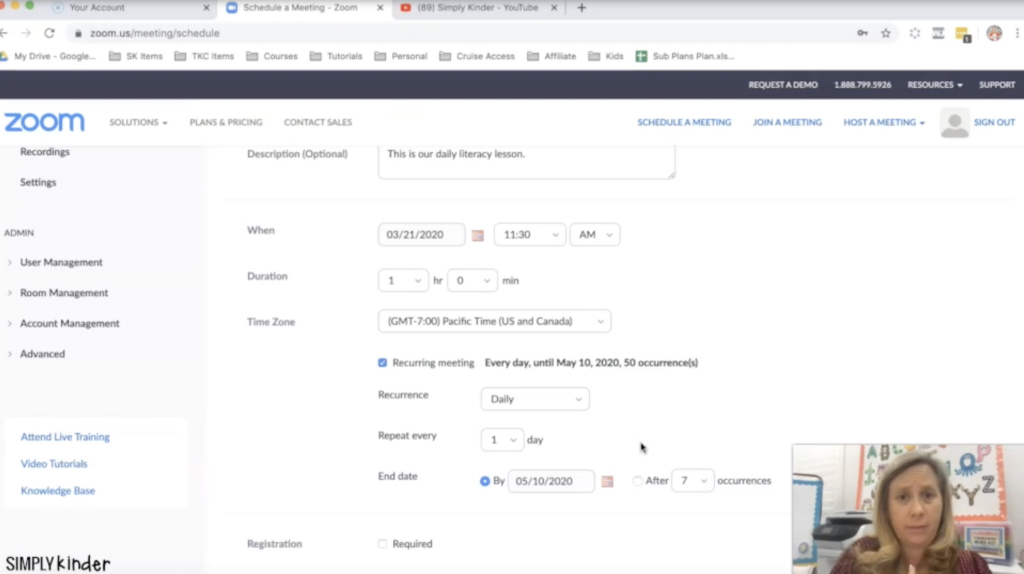
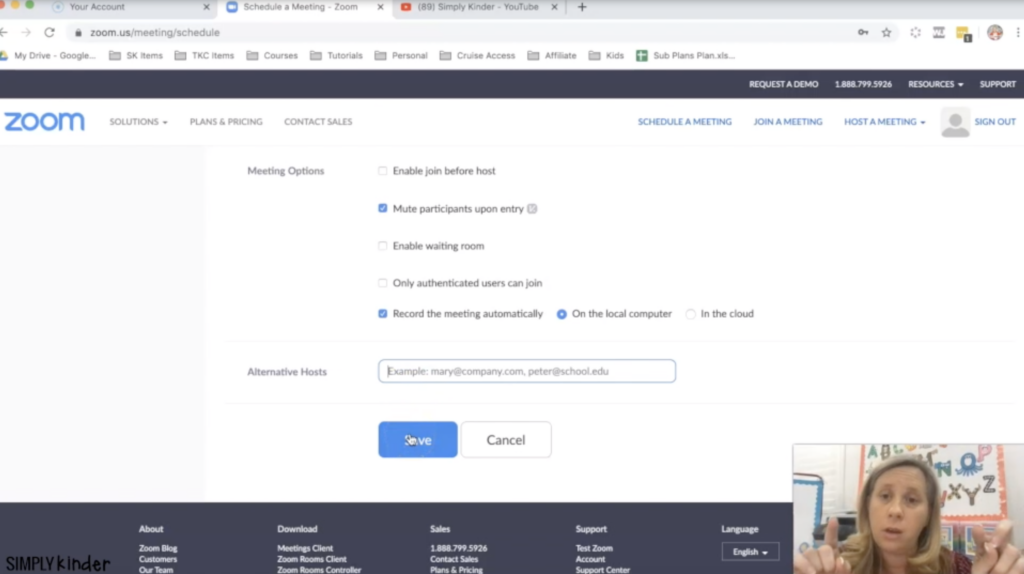
Set your meeting up like this:
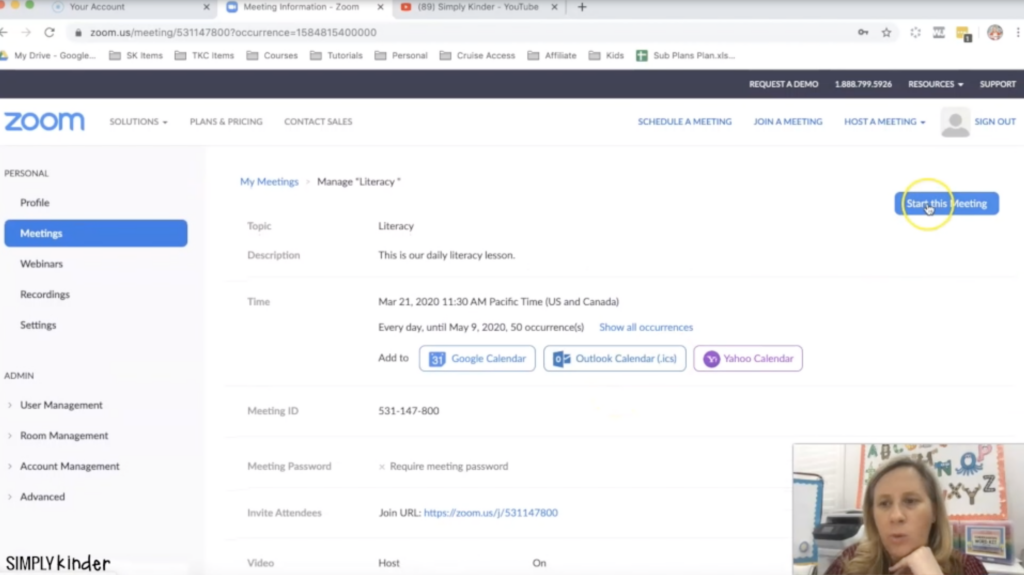

OK so say you are ready to have your meeting. You push the START THIS MEETING button and your meeting will start.
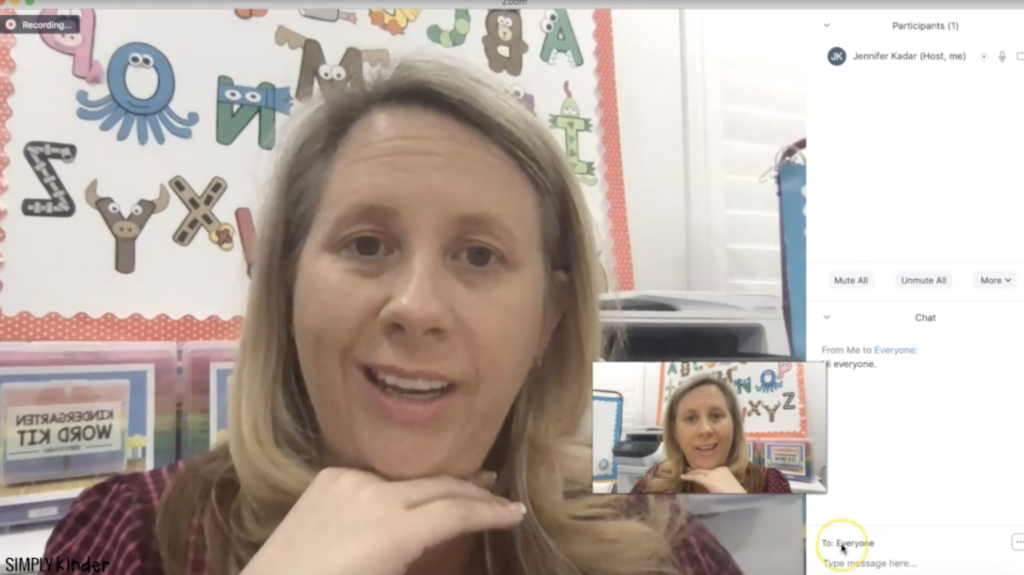
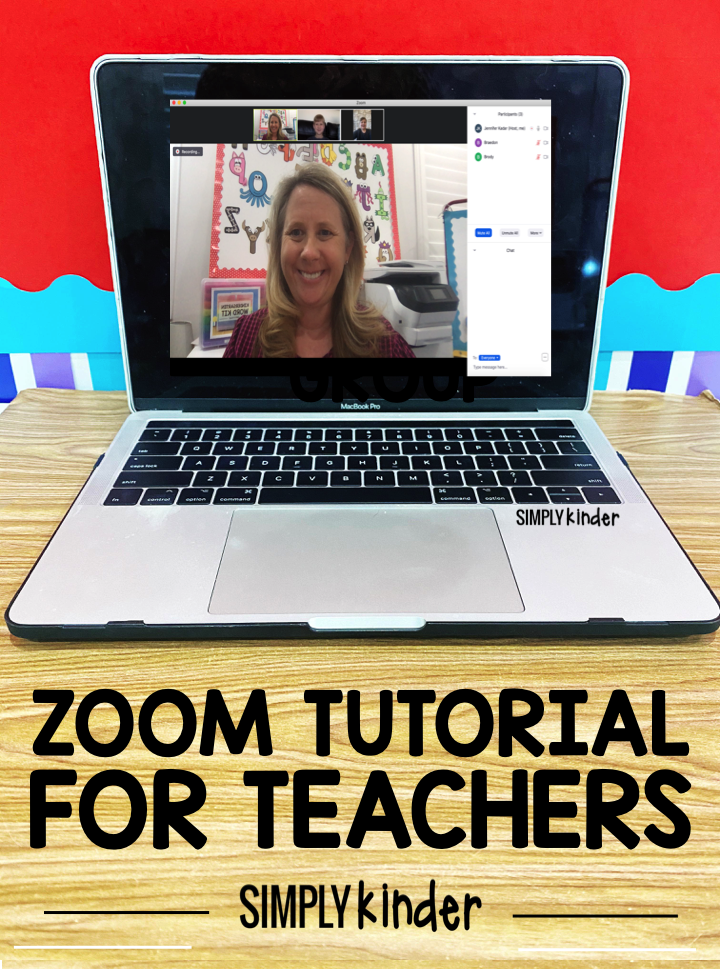
Right off I would set YOUR dashboard to show the participant list and chatbox. As the administrator of the meeting, it will be helpful for you to see both. There is a black bar at the bottom of your page that will extend up and down as you hover over it.
OK, now a TOUR of the different options:
Mute & Video – These two are located in the bottom black bar. They allow you to shut off and turn on your sound and video. If you shut off your video, your profile picture will default.
Invite – Say you need to get someone the link while you are in your meeting, click the invite and COPY URL. You can then send it to them. (Trick – the numbers at the end of the URL are the meeting number).
Participants – This box will show you who is in your meeting. You can MUTE ALL, UNMUTE ALL, and there are a few other group options at the bottom of this box (take a peek). Each individual to you can control the video and audio of those people so it’s a helpful box to have open.
Share Screen – This allows you to share a URL, your desktop, or use the whiteboard. We will get into that in a moment.
Chatting – Allows you to chat with the members in your meeting. Make sure if you are trying to chat, you select EVERYONE because you do have the option of just chatting with individuals. (I would not recommend though).
Pause / Stop Recording – This will allow you to pause the recording of the video. I would not suggest using this feature.
So let’s talk Share Screen. This is a way for you to share your desktop, a URL, or use their built-in whiteboard. To start just hit Share Screen and select which option and to end there will be a STOP SHARE option at the top.
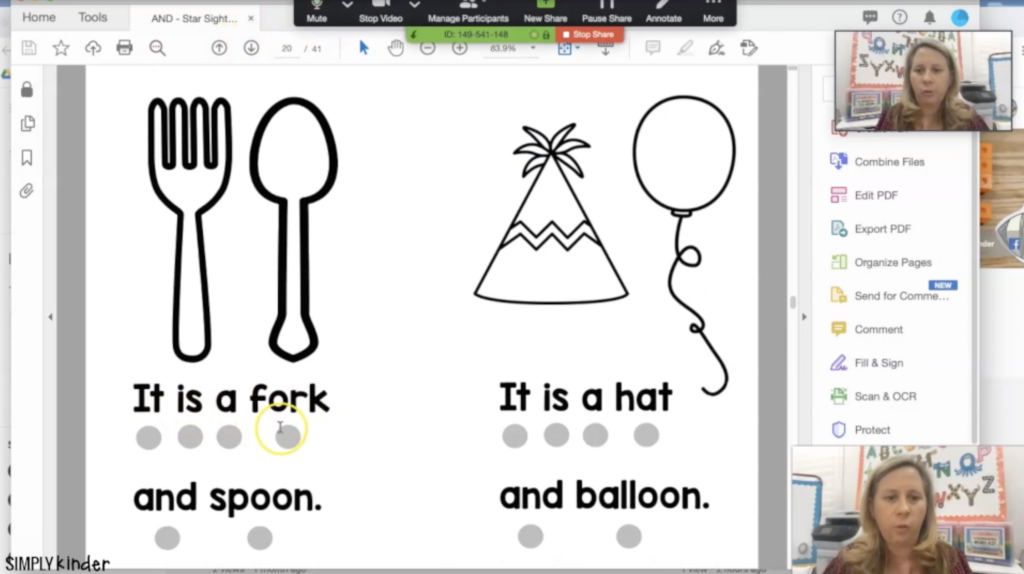
Let’s start with your desktop. It’s a great way to share a YouTube video in a browser, sharing a PDF, a PowerPoint, or really anything you can open on your computer. Whatever you see on your desktop will show and you will also see videos of your participants on the right hand side going down. A few words of caution:
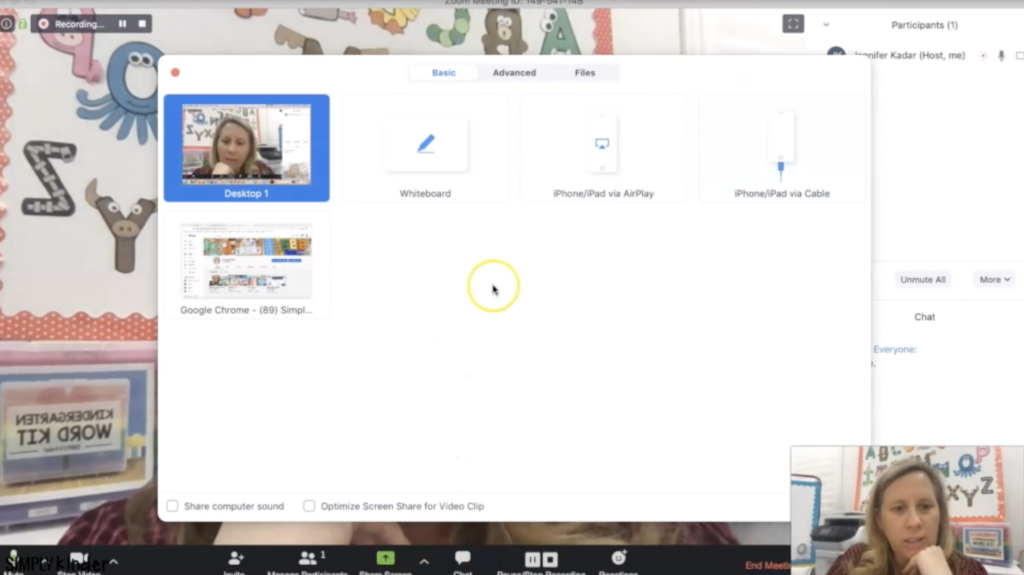
Now let’s talk about sharing from a browser. You select Google Chrome and it will just share what is displayed on the browser without anything in the background. Just make sure you have your browser open to the page you want to display. Once you connect it, just minimize it and go back to your ZOOM meeting to manage.
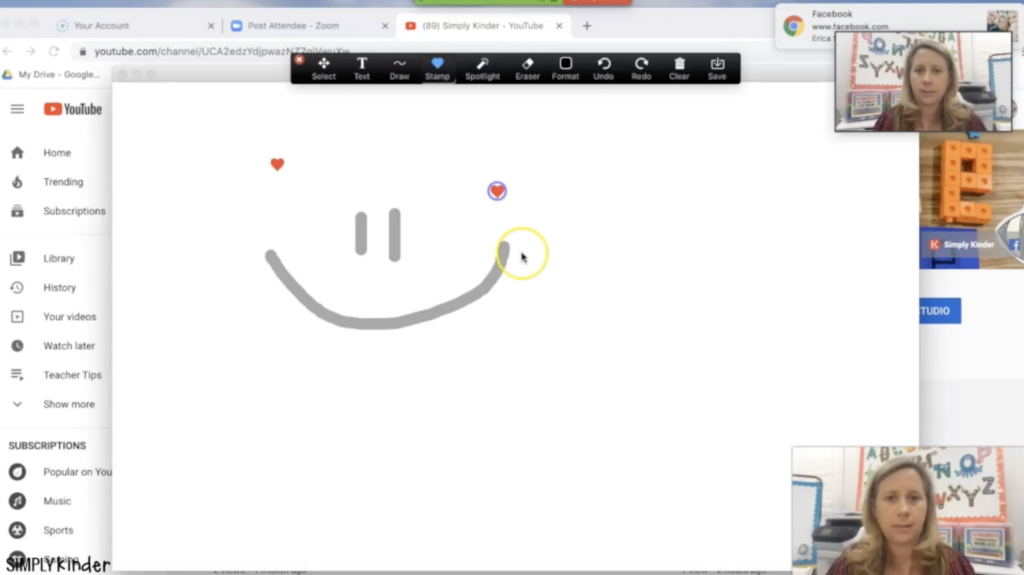
Whiteboard is equally as easy. Just select whiteboard and you have a digital board your students will see. Again, it ends when you select END SHARE.
You are now ready for students. Yay! I invited my own children in so you could see what it looks like.
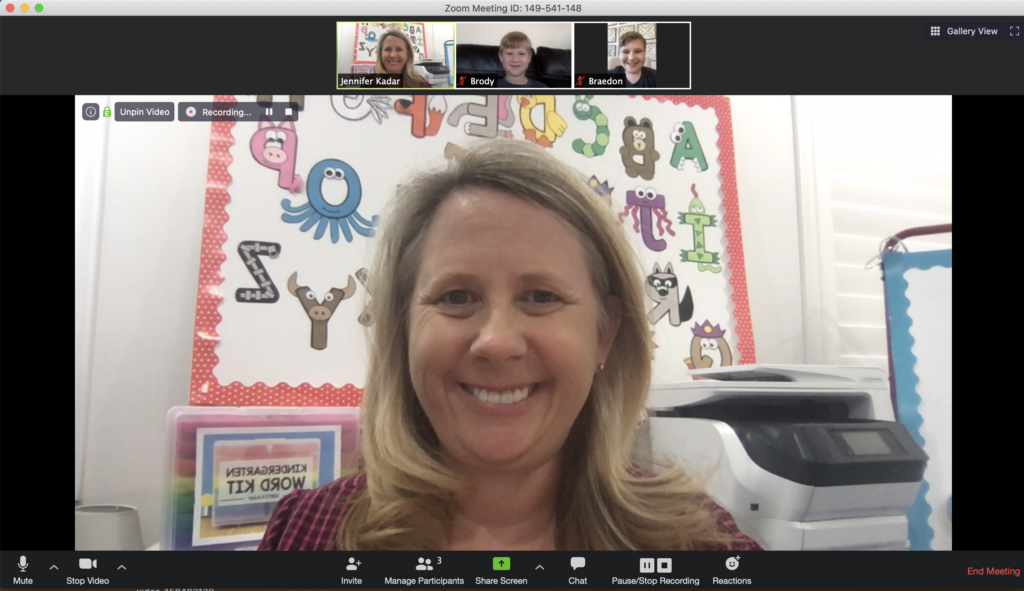
The system will make a DING sound when someone joins. This alerts you there is a new person in the meeting. You will default to SPEAKER VIEW. The yellow circle at the top allows you to CHANGE to the Gallery view.
VERY IMPORTANT: The screen recording is dependent on YOUR view as the host. So if you are in Speaker View, it will just record who is speaking. I would suggest being in Gallery View.
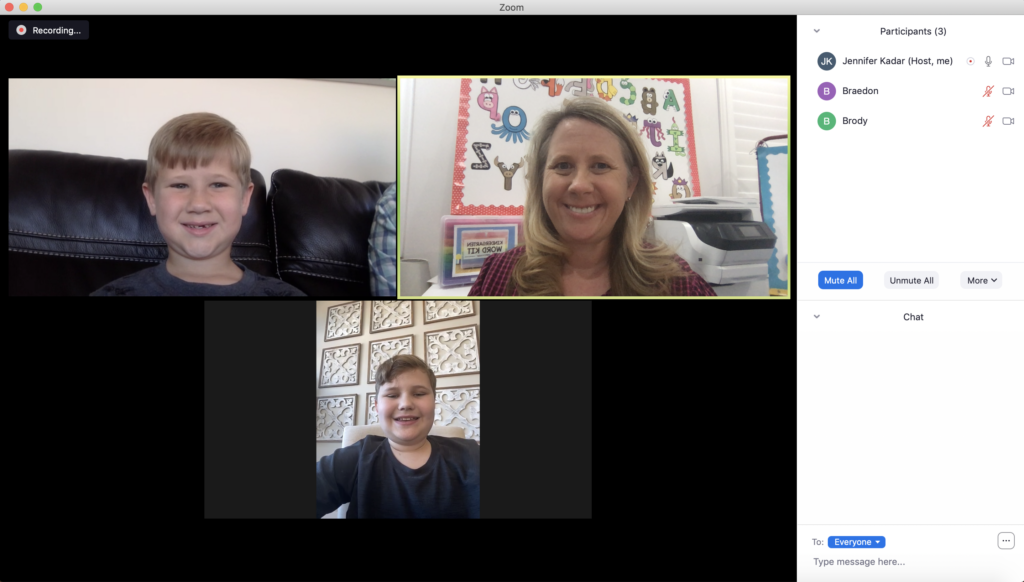
Gallery view will allow you to see all of your students at once and the recording will also show all of your students.
Your participants can also control their views. From a desktop, they just select speaker or gallery, and from the phone they swipe to the right. You may want to tell them this when you start so they can see all of their classmates! It is also on the directions page for families we give you in a bit.
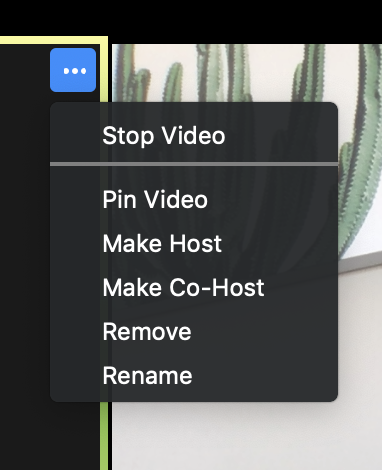
You can control the audio from the participant box OR you have options in each video box too. Just pick the three dots in the upper right hand corner and you can see those options (but I believe the audio is next to the three dots). If you have a student who does not show the correct name, this is where you would change that.
So you go through and do your meeting. We share with you also in the video how to stream the meeting to Facebook. Look towards the end of the video for that.
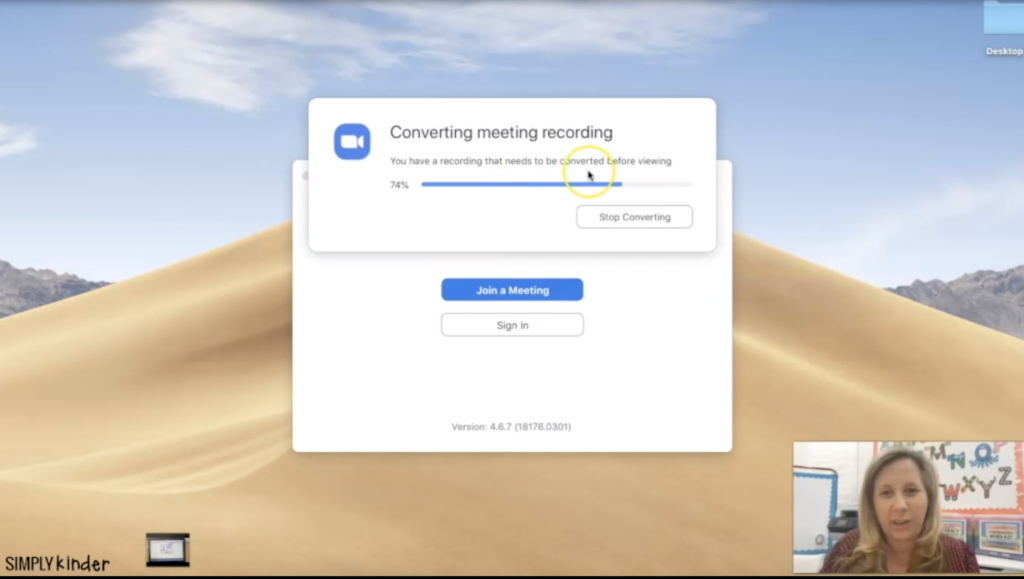
To end your meeting, you just select END MEETING in the bottom right hand corner. Because you set it up to save to your device, it will start the saving process for you.
There you have it. It’s a little much when it’s all typed out like this, but we wanted to make it extremely thorough so you feel comfortable. I promise you, it does get easier!

We also made you a flyer to send digitally to your families. Have them print this out and become familiar with it.
We have several different options:
This file is currently available in English and Spanish. A huge thank you to Maria Pirner who translated it into Chilean Spanish for us. If you are able to translate for us in another version, please email us at Jennifer@SimplyKinder.com and we will include it for teachers to use.
But sure to download and SAVE both files. We give you special permission to email the file to your families OR place the file in a secure space (like Google Classroom or Private Facebook Group for your class, etc. It may only be shared with your class and not out there for everyone to grab. Please email us Jennifer@SimplyKinder.com if you have any questions.